Awhile back, I published
a series of posts about the CGS Revit Tools. I was invited by the developer to review the tools and post my thoughts about them on
Revit Add-ons, and I finally made time to do just that.
Concept
From the vendor's website: "CGS Revit Tools enhance functionality and improve usability of Autodesk Revit Architecture, Structure and MEP resulting in more efficient project design."
Setup
I downloaded the trial from the
CGS website. After providing my contact information, the site emailed me a link for the download. After the download completed, I ran the .exe file. The program installed painlessly, and the tools were in the interface when I next launched Revit.
On the downside, the trial registration process felt a little too invasive to me. Requiring a phone number in this day and age might be a little over the top. I think name, email address, company, city, state/province and country should be enough information for acquiring a trial version of any software.
 |
| The registration screen |
Setup grade: B
Discoverability
Each tool has Revit-style contextual help within the interface, some with videos.
 |
| Contextual help |
Pressing
<F1> launches a corresponding video on YouTube.
 |
| Video on YouTube |
This is a good idea, but I have a few nits to pick with the execution:
- These are short, demo-like videos. For instance, the one for the BIM Query tool, a pretty powerful tool at that, is only 1 minute and 23 seconds long! There's nothing here to help with exploring workflows, settings, advanced usage, etc.
- There's no audio!
- The videos are part of a playlist on YouTube, so the next video, covering a different tool, starts automatically.
I for one prefer written documentation that thoroughly explains options, workflows, etc. Yes, I know that thorough, image-rich documentation takes a long time (believe me, I know), but it also shows a level of care that's important. Having said that though, I did watch a few of the videos while writing this article and they were useful.
Discoverability grade: C
Usability
The tools install to a CGS Revit Tools tab in the ribbon. For the most part, the icons are pleasing and follow the Revit interface standards.
 |
| The CGS Revit Tools tab |
First up is the is the
BIM Manager panel.
 |
| The BIM Manager panel |
The first tool is
Folder. It opens an instance of Windows Explorer to the folder the active Revit file is in, with the file selected.
 |
| The Folder tool |
 |
| The resultant Windows Explorer window |
Simple. Useful. Excellent.
Next up is the
Export tool. It's used to export families from the active project into a folder of the user's choosing.
 |
| The Export tool |
The contextual help says that selections are supported, but this didn't work for me. Instead I was presented with a dialog box where I could quickly select the families I was interested in exporting. I selected all casework, doors and furniture. The
Open folder after export option was appreciated.
 |
| The Export dialog |
 |
| The resultant Doors folder |
Very useful.
Next up is the
Import tool. It's used to import multiple families into a project.
 |
| The Import tool |
The video did help with the workflow here. If one clicks on the checkbox next to a folder in the left hand pane, all the families in that folder are selected. If one clicks on the folder itself, thumbnails for the families in that folder are shown and the families may be selected individually.
 |
| The Import dialog |
Again, very useful. I have no idea what the settings
Overwrite graphics or
Overwrite parameters are for though...
The
Project Cleanup tool is actually a series of tools. Finally, a way to quickly and easily cleanup unplaced rooms, areas and spaces? "Thank you sweet Lord Jesus!" (No offence intended.) Seriously though, thank you CGS!
 |
| The Project Cleanup tools |
Unfortunately there doesn't appear to be any Help videos for these tools...
Here are screen captures to give you an idea of how each tool can be used.
 |
| The Material Cleanup dialog |
 |
| The Unplaced Room Cleanup dialog |
 |
| The Unplaced Area Cleanup dialog |
 |
| The Unplaced Space Cleanup dialog |
The
Check views that are not placed on sheets option in the
View Cleanup dialog is very much appreciated!
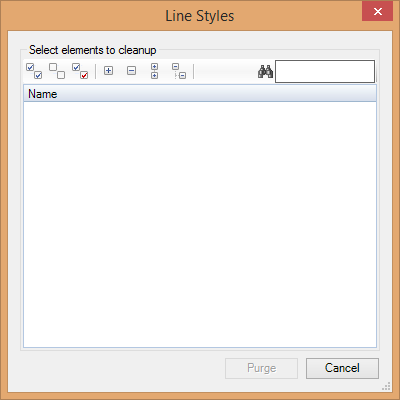 |
| The Line Style Cleanup dialog |
 |
| The Line Pattern Cleanup dialog |
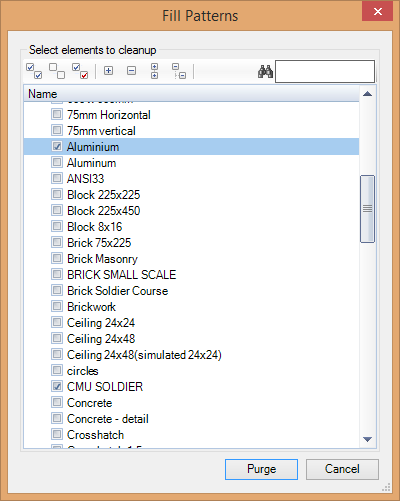 |
| The Fill Pattern Cleanup dialog |
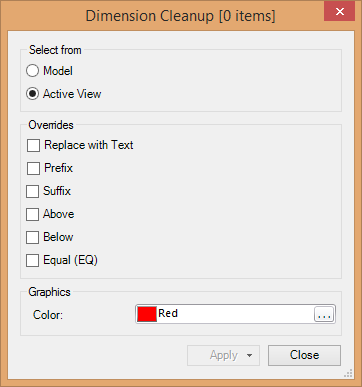 |
| The Dimension Cleanup dialog |
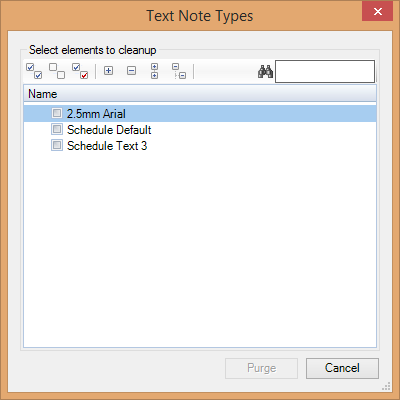 |
| The Text Note Type Cleanup dialog |
Oh my, now we're cooking with fuel oil!
The next tool,
Multi Type Editor, is used to edit multiple type properties within a family.
 |
| The Multi Type Editor tool |
 |
| The Multi Type Editor window |
Fantastic!
Up next is the
BIM Query tool. It's used to edit model data in an Excel-like window - actually, I'm confident stating that this is an instance of Excel imbedded in the BIM Query window! The data can also be saved to a .xls or .xlsx file, perhaps for editing by others. After editing, changes can be applied back to the model!
 |
| The BIM Query tool |
 |
| Opening a Category in the BIM Query window |
 |
| The Doors category loaded into the BIM Query window |
Wow. There are still A LOT of tools to go through and
Project Cleanup,
Multi Type Editor and
BIM Query may very well be worth the price of admission alone.
The second panel of tools is
Analysis.
 |
| The Analysis panel |
The first tool,
Analyze, is actually a series of tools:
Insertion,
Thickness,
Room Lighting and
Swing Direction. These tools query element properties and populate a series of shared parameters with the values. The parameter values may then be used in tags and schedules.
 |
| The Insertion tool |
 |
| Message displayed when using Insertion on a structural column |
 |
| The structural column's Properties window before and after using the Insertion tool |
 |
| A wall's Properties window before and after using the Thickness tool |
The
Room Lighting tool calculates the volume of lighting for rooms as the ratio between the room area and the sum of window areas for each room. It also provides an editable dialogue box where one can change names and marks for rooms.
 |
| The Room Lighting tool |
 |
| The Room Lighting window |
The
Swing Direction tool calculates the swing direction of all the doors in the project.
 |
| The Swing Direction tool |
The
Swing Direction window is used to define the default swing for each door family, though I don't understand the usefulness of this.
 |
| The Swing Direction window |
 |
| A door's Properties window before and after using the Swing Direction tool |
 |
| A different door's calculated swing direction |
The
Swing Direction tool in particular is
killer.
It's more than a little confusing that the
Insertion and
Thickness tools are used on individual elements while
Room Lighting and
Swing Direction process all the elements in the file. For myself, I prefer the done-in-one approach of the latter two tools.
The
Update tool refreshes parameter values that were created with one of the
Analyze tools.
 |
| The Update tool |
Next up is the
Annotate panel.
 |
| The Annotate panel |
The first
Annotate tool is
Align, which is itself a grouping of tools.
 |
| The Align tools |
The
Align tools are self-explanatory from their contextual help, and worked as advertised, for the most part.
Although the contextual help states that
Simple Align only works on one model line and one text note or label at a time, it worked for me with one model line and multiple text notes.
 |
| The Simple Align tool |
 |
| The Simple Align dialog |
Align Text on the other hand only worked for me with a single model line and a single text note at a time.
 |
| The Align Text tool |
 |
| The Align Text dialog |
The
Left,
Right,
Top and
Bottom tools naturally work similar to each other.
 |
| The Align Left tool |
Again, the
Renumber tool is a grouping of tools.
 |
| The Renumber tools |
The
Renumber by Room tool renumbers elements based on rooms they fall within.
 |
| The Renumber by Room tool |
 |
| The Renumber by Room dialog |
 |
| Before and after using the Renumber by Room tool |
Use the
Renumber Mark Parameter tool to renumber items sequentially. Simply set the desired options in the dialog box and then pick the elements in the order you want them numbered.
 |
| The Renumber Mark Parameter tool |
 |
| The Renumber Mark Parameter dialog |
The
Renumber Grid tool works in the same fashion as the
Renumber Mark Parameter tool. It's only the target element type that differs. Ditto for the
Renumber Room, Space or Area and
Renumber Views on Sheets tools.
 |
| The Renumber Grid tool |
 |
| The Renumber Grid dialog |
 |
| The Renumber Room, Space or Area tool |
 |
| The Renumber Room, Space or Area dialog |
 |
| The Renumber Views on Sheets tool |
 |
| The Renumber Views on Sheets dialog |
The
Material Legend tool creates a material legend for a selected view. The material legend must be placed in a drafting view.
 |
| The Material Legend tool |
 |
| The Material Legend dialog |
 |
| The resultant material legend |
Nice!
The
Legend by Category tool is quite similar to the
Material Legend tool, except that I had a little more trouble with it. The category legend has to be placed in a legend view, and that makes sense, but the tool wouldn't work until I manually placed at least one legend component in the view. I drug a door into the view from the
Project Browser and then the
Legend by Category tool worked. It seemed odd to me that I had to go through this extra step...
 |
| The Legend by Category tool |
 |
| The Legend by Category dialog |
 |
| The resultant door legend |
Again, nice result!
The next tool panel is
Modify.
 |
| The Modify panel |
The first tool in the
Modify panel is
Draw Bounding Box. This tool is used to place detail lines around the selected elements. 'Nuff said.
 |
| The Show Bounding Box tool |
The Room to Floor tool is used to create floors from rooms. The tool operates on a selection set so many rooms may be processed at once.
 |
| The Room to Floor tool |
 |
| The Room to Floor dialog |
I like it!
The
Edit Grid Name tool is used to edit the selected grids' names in a dialog box.
 |
| The Edit Grid Name tool |
 |
| The Edit Grid Name tool |
This a nice, convenient option.
The
Multi Join tool is used to join multiple elements together, such as walls. Rather than having to click on every element multiple times to join them together like the built-in tools, this tool operates on a selection. Ohhhhhh yeah!
 |
| The Multi Join tool |
 |
| The Multi Join dialog |
There are two
Assembly tools:
Create Assembly and
Create Assembly Views.
 |
| The Assembly tools |
Create Assembly creates an assembly from the selected elements. I had problems with it though - I wanted to create a single assembly and it created multiple assemblies.
 |
| Using the CGS Create Assembly tool |
So instead I used the built-in
Create Assembly tool to create the assembly.
 |
| Using the built-in Create Assembly tool |
Here's where it gets interesting though. The
Create Assembly Views tool creates a sheet and views for the selected assemblies.
 |
| The Create Assembly Views tool |
 |
| The Create Assembly Views dialog |
 |
| The resultant views on a sheet |
That's sick! (In a good way - I'm running out of superlatives here.)
The
View panel is next.
 |
| The View panel |
The
Resize Section Box tool provides some options for resizing section boxes.
 |
| The Resize Section Box tool |
 |
| The Manual tab in the Resize Section Box dialog |
 |
| The result of using the Set From Selection button |
 |
| The Room/Space tab of the Resize Section Box dialog |
 |
| The View tab of the Resize Section Box dialog |
I'm not really wowed by the
Resize Section Box tool. It gets the job done, and it's nice to have options to adjust the section box without actually having to view the section box element, but there's some stiff competition in the section box add-in space, with some of the add-ins available for free. I think this is a tool that CGS could improve quite a bit, including the tools icon, which is the only one in the entire suite that seems out of place.
The
Toggle Category tool is used to hide or unhide categories in multiple views. In Revit 2014 and later, this would probably be better achieved using view templates and
Visibility Graphics settings.
 |
| The Category Toggle tool |
 |
| The Toggle Category dialog |
The
Instance Toggle tool is very similar to the
Toggle Category tool. Again, this might be better achieved with view templates.
 |
| The Instance Toggle tool |
 |
| The Instance Toggle dialog |
Next there are quick access tools for hiding and unhiding frequently used categories of elements. Clever and useful.
 |
| Hide category in the current view |
 |
| Unhide category in the current view |
There are two
Zoom To tools,
Zoom to Room or Space and
Zoom to Selection. These tools are self-explanatory.
 |
| The Zoom to Room or Space tool |
 |
| The Zoom to Room or Space dialog |
 |
| The Zoom to Selection tool |
Next come a series of crop region tools. The
2D View Crop Region tool simply reports the width and height of the current crop region. One may also change these value in the dialog box.
 |
| The 2D View Crop Region tool |
 |
| The 2D View Crop Region dialog |
The
Crop Region from Selection tool redefines the crop region to the extents of the selection, plus an offset if desired.
 |
| The Crop Region from Selection tool |
 |
| The Crop Region from Selection dialog |
The
Match Crop Region tool allows one to set the crop region in the active view equal to the crop region from the selected view.
 |
| The Match Crop Region tool |
 |
| The Match Crop Region dialog |
The
Camera View Crop Region tool provides a few options for modifying crop regions in 3D perspective views. Counter intuitively, it must be used in a 2D view and the 3D view is selected from a pick list.
 |
| The Camera View Crop Region tool |
 |
| The Camera View Crop Region dialog |
The
View/Sheet Manager tool allows one to edit view or sheet parameters and to duplicate views.
 |
| The View/Sheet Manager tool |
 |
| The View/Sheet Manager window |
The
Align Viewport on Sheet tool allows one to position viewports on sheets with repeatable precision. Handy for when one wants their drawing set to look, you know, professional.
 |
| The Align Viewport on Sheet tool |
 |
| The Align Viewport on Sheet dialog |
The
Room Views tool provides a very convenient method for creating plan and elevation views from rooms.
 |
| The Room Views tool |
 |
| The Room Views dialog |
 |
| A created elevation view |
 |
| A created plan view |
The
View Depth Override tool is used to color-code elements based on their distance from the view plane.
 |
| The View Depth Override tool |
 |
| The View Depth Override dialog |
 |
| A view before using the View Depth Override tool |
 |
| A view after using the View Depth Override tool |
Up next is the
Select panel of tools.
 |
| The Select tools |
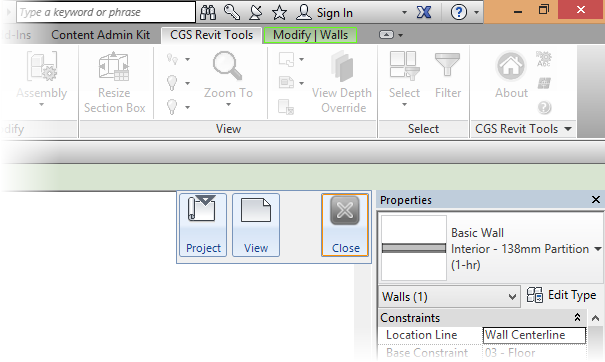
The first tool,
Select, is used to select elements based on some criteria. Select an element first and then select a sub-tool.
The sub-tools are:
Select Category,
Select Type,
Select Bounding,
Select Host,
Select Hosted and
Select Workset.
 |
| The Select Tools |
 |
| The Select Category tool |
An options window is then displayed allowing one to select all matching elements in the project or in the view. That's nice integration.
 |
| The Select Category options window |
The
Select Bounding tool selects the intersecting elements.
 |
| The Select Bounding tool |
The
Filter tool allows one to drill down to a fine level of detail and select elements based on their properties, such as phase, room, etc.
 |
| The Filter tool |
 |
| The Filter dialog |
The last panel is
CGS Revit Tools. It contains
About,
Settings,
License and
Help tools.
 |
| The CGS Revit Tools ribbon panel |
 |
| The About window |
 |
| The Settings dialog |
 |
| The Licensing dialog |
The Help tool opens the CGS website.
Whew, that's a lot of tools!
While there may be better add-ins available for individual functions, the CGS Revit tools offers a wealth of tools conveniently located on one ribbon tab.
Usability grade: A
Value
The CGS Tools for Revit are offered on subscription. The annual rates are as follows:
- $300 Single Seat
- $600 – 10 Seats ($60 per user)
- $1200 – 50 Seats ($24 per user)
- $2400 – 250 Seats ($9.60 per user)
Right now CGS is offering a 15% discount or a free Samsung Galaxy tablet with a purchase of over USD 1,000.
Value grade: A+
Final Grade


No comments:
Post a Comment